Thursday, November 26, 2009
Wednesday, November 25, 2009
Work harder today!
deal to me.
Wednesday, November 18, 2009
sed editor
Here /2 means we change the second word to empty
for the sentence: will this black car work?
echo "will this black car work?" |sed 's/[a-zA-Z0-9][a-zA-Z0-9]*\s//3' will output
> will this car work?
\s matches the space and tab
去掉所有的空白行:“:%s/\(\s*\n\)\+/\r/”。这回多了“\(”、 \)”、 \n”、 \r”和
“ “ “
“*”。“*”代表对前面的字符(此处为“ \s”)匹配零次或多次(越多越好;使用“ \*”表
示单纯的“*”字符),“\n”代表换行符,“ \r”代表回车符,“\(”和“\)”对表达式进
行分组,使其被视作一个不可分割的整体。因此,这个表达式的完整意义是,把连续的换行符
(包含换行符前面可能有的连续空白字符)替换成为一个单个的换行符。唯一很特殊的地方是,
在模式中使用的是“ \n”,而被替换的内容中却不能使用“ \n”,而只能使用“\r”。原因是
历史造成的,详情如果有兴趣的话可以查看“:help NL-used-for-Nul”。
Flag -n
The "-n" option will not print anything unless an explicit request to print is found. I mentioned the "/p" flag to the substitute command as one way to turn printing back on. Let me clarify this. The command
- sed 's/PATTERN/&/p' file
acts like the cat program if PATTERN is not in the file: e.g. nothing is changed. If PATTERN is in the file, then each line that has this is printed twice. Add the "-n" option and the example acts like grep:
- sed -n 's/PATTERN/&/p' file
Nothing is printed, except those lines with PATTERN included.
sed -f scriptname
If you have a large number of sed commands, you can put them into a file and use
- sed -f sedscript
new
where sedscript could look like this:
- # sed comment - This script changes lower case vowels to upper case
s/a/A/g
s/e/E/g
s/i/I/g
s/o/O/g
s/u/U/g
When there are several commands in one file, each command must be on a separate line.
Also see here
Quoting multiple sed lines in the Bourne shell
The Bourne shell makes this easier as a quote can cover several lines:
#!/bin/shsed '
s/a/A/g
s/e/E/g
s/i/I/g
s/o/O/g
s/u/U/g'
Monday, November 16, 2009
installation
rpm –ivh packagename
upgrade a package
rpm –Uvh packagename
create a tar file
tar –cvf myfiles.tar mydir/
(add z if you are dealing with or creating .tgz (.tar.gz) files)
standard install from source
tar –xvzf Apackage.tar.gz
cd Apackage
./configure
make
make install
Saturday, November 14, 2009
Makefile note-findstring
$(findstring find,in)- Searches in for an occurrence of find. If it occurs, the value is find; otherwise, the value is empty. You can use this function in a conditional to test for the presence of a specific substring in a given string. Thus, the two examples,
$(findstring a,a b c)
$(findstring a,b c) - produce the values `a' and `' (the empty string), respectively.
You can write a conditional that tests make command flags such as `-t' by using the variable MAKEFLAGS together with the findstring function (see section Functions for String Substitution and Analysis). This is useful when touch is not enough to make a file appear up to date.
The findstring function determines whether one string appears as a substring of another. If you want to test for the `-t' flag, use `t' as the first string and the value of MAKEFLAGS as the other.
For example, here is how to arrange to use `ranlib -t' to finish marking an archive file up to date:
archive.a: ...
ifneq (,$(findstring t,$(MAKEFLAGS)))
       +touch archive.a
       +ranlib -t archive.a
else
       ranlib archive.a
endif
The `+' prefix marks those command lines as "recursive" so that they will be executed despite use of the `-t' flag. See section Recursive Use of make.
Friday, November 13, 2009
Makefile Notes
The different assignment operators have somewhat different meanings.
- =
-
VARIABLE = text string
This is the usual assignment statement that all implementations of make support. The expression on the right hand side is not evaluated until the value of
$(VARIABLE)is actually used somewhere. Thus, if you do the following:X = 1
Y = $(X)
X = 2Then
$(Y)later in the makefile will evaluate to “2”. - := (THIS ONE IS PREFERED!!)
-
VARIABLE := expr
This is the same as “VARIABLE = expr” except that the right hand side is evaluated at the time of the assignment. Thus if
    X := 1
   Y := $(X)
   X := 2
then
$(Y)later in the makefile will evaluate to “1” since that's what$(X)was when$(Y)was defined. - +=
-
VARIABLE += expr
Appends the string to the previous contents of the variable, separated by a space. If the variable was previously assigned with
:=, then the right hand side is evaluated before appending.
Generating Prerequisites Automatically
The practice we recommend for automatic prerequisite generation is to have one makefile corresponding to each source file. For each source file name.c there is a makefile name.d which lists what files the object file name.o depends on. That way only the source files that have changed need to be rescanned to produce the new prerequisites.
Here is the pattern rule to generate a file of prerequisites (i.e., a makefile) called name.d from a C source file called name.c:
     %.d: %.c
            @set -e; rm -f $@; \
             $(CC) -M $(CPPFLAGS) $< > $@.$$$$; \
             sed 's,\($*\)\.o[ :]*,\1.o $@ : ,g' < $@.$$$$ > $@; \
             rm -f $@.$$$$
See Pattern Rules, for information on defining pattern rules. The `-e' flag to the shell causes it to exit immediately if the $(CC) command (or any other command) fails (exits with a nonzero status). With the GNU C compiler, you may wish to use the `-MM' flag instead of `-M'. This omits prerequisites on system header files. See Options Controlling the Preprocessor, for details.
The purpose of the sed command is to translate (for example):
main.o : main.c defs.h
into:
main.o main.d : main.c defs.h
This makes each `.d' file depend on all the source and header files that the corresponding `.o' file depends on. make then knows it must regenerate the prerequisites whenever any of the source or header files changes.
Once you've defined the rule to remake the `.d' files, you then use the include directive to read them all in. See Include. For example:
     sources = foo.c bar.c

    include $(sources:.c=.d)
(This example uses a substitution variable reference to translate the list of source files `foo.c bar.c' into a list of prerequisite makefiles, `foo.d bar.d'. See Substitution Refs, for full information on substitution references.) Since the `.d' files are makefiles like any others, make will remake them as necessary with no further work from you. See Remaking Makefiles.
Note that the `.d' files contain target definitions; you should be sure to place the include directive after the first, default goal in your makefiles or run the risk of having a random object file become the default goal. See How Make Works.
INCLUDE DIRECTIVE
The
include directive tells make to suspend reading the current makefile and read one or more other makefiles before continuing. The directive is a line in the makefile that looks like this: include filenames...
filenames can contain shell file name patterns. If filenames is empty, nothing is included and no error is printed. Extra spaces are allowed and ignored at the beginning of the line, but a tab is not allowed. (If the line begins with a tab, it will be considered a command line.) Whitespace is required between include and the file names, and between file names; extra whitespace is ignored there and at the end of the directive. A comment starting with `#' is allowed at the end of the line. If the file names contain any variable or function references, they are expanded. See How to Use Variables.
For example, if you have three .mk files, a.mk, b.mk, and c.mk, and $(bar) expands to bish bash, then the following expression
include foo *.mk $(bar)
is equivalent to
include foo a.mk b.mk c.mk bish bash
When make processes an include directive, it suspends reading of the containing makefile and reads from each listed file in turn. When that is finished, make resumes reading the makefile in which the directive appears.
One occasion for using include directives is when several programs, handled by individual makefiles in various directories, need to use a common set of variable definitions (see Setting Variables) or pattern rules (see Defining and Redefining Pattern Rules).
Another such occasion is when you want to generate prerequisites from source files automatically; the prerequisites can be put in a file that is included by the main makefile. This practice is generally cleaner than that of somehow appending the prerequisites to the end of the main makefile as has been traditionally done with other versions of make. See Automatic Prerequisites. If the specified name does not start with a slash, and the file is not found in the current directory, several other directories are searched. First, any directories you have specified with the `-I' or `--include-dir' option are searched (see Summary of Options). Then the following directories (if they exist) are searched, in this order: prefix/include (normally /usr/local/include 1) /usr/gnu/include, /usr/local/include, /usr/include.
If an included makefile cannot be found in any of these directories, a warning message is generated, but it is not an immediately fatal error; processing of the makefile containing the include continues. Once it has finished reading makefiles, make will try to remake any that are out of date or don't exist. See How Makefiles Are Remade. Only after it has tried to find a way to remake a makefile and failed, will make diagnose the missing makefile as a fatal error.
If you want make to simply ignore a makefile which does not exist and cannot be remade, with no error message, use the -include directive instead of include, like this:
-include filenames...
HOW MAKE WORKS
How make Processes a Makefile
By default, make starts with the first target (not targets whose names start with `.'). This is called the default goal. (Goals are the targets that make strives ultimately to update. You can override this behavior using the command line (see Arguments to Specify the Goals) or with the .DEFAULT_GOAL special variable (see Other Special Variables). In the simple example of the previous section, the default goal is to update the executable program edit; therefore, we put that rule first.
Thus, when you give the command:
make
make reads the makefile in the current directory and begins by processing the first rule. In the example, this rule is for relinking edit; but before make can fully process this rule, it must process the rules for the files that edit depends on, which in this case are the object files. Each of these files is processed according to its own rule. These rules say to update each `.o' file by compiling its source file. The recompilation must be done if the source file, or any of the header files named as prerequisites, is more recent than the object file, or if the object file does not exist.
The other rules are processed because their targets appear as prerequisites of the goal. If some other rule is not depended on by the goal (or anything it depends on, etc.), that rule is not processed, unless you tell make to do so (with a command such as make clean).
Before recompiling an object file, make considers updating its prerequisites, the source file and header files. This makefile does not specify anything to be done for them—the `.c' and `.h' files are not the targets of any rules—so make does nothing for these files. But make would update automatically generated C programs, such as those made by Bison or Yacc, by their own rules at this time.
After recompiling whichever object files need it, make decides whether to relink edit. This must be done if the file edit does not exist, or if any of the object files are newer than it. If an object file was just recompiled, it is now newer than edit, so edit is relinked. Thus, if we change the file insert.c and run make, make will compile that file to update insert.o, and then link edit. If we change the file command.h and run make, make will recompile the object files kbd.o, command.o and files.o and then link the file edit.
Thursday, November 12, 2009
The DDD debugging tool
A front-end for the gdb!!!
How to examine the data:
We can use all the techniques in gdb by typing commands :)
Besides,
- The quickest way to examine variables is to move the pointer on an occurrence in the source text. The value is displayed in the source line; after a second, a popup window (called value tip) shows the variable value. This is useful for quick examination of several simple values.
- If you want to refer to variable values at a later time, you can print the value in the debugger console. This allows for displaying and examining larger data structures.
- If you want to examine complex data structures, you can display them graphically in the data window. Displays remain effective until you delete them; they are updated each time the program stops. This is useful for large dynamic structures.
- If you want to examine arrays of numeric values, you can plot them graphically in a separate plot window. The plot is updated each time the program stops. This is useful for large numeric arrays.
- Using GDB or DBX, you can also examine memory contents in any of several formats, independently of your program's data types.
Monday, November 2, 2009
shell programming
for (( i = 0; i < 10; i++ )) #pay attention to the spaces!!!
do
echo ${i}
done
if:
a=3
if [ $a -lt 2 ] ; # the ;
then
echo $a;
fi
add:
a=3
b=4
c=$(( a + b )) #with $(( )), no $ is needed
echo $c
Some other possibilities to do addition: let key word!
let count=count+1

let "count+=1"

let "count++"
Thursday, October 22, 2009
header files~
Introduction
While many simple programs fit into a single C or CPP source file, any serious project is going to need splitting up into several source files in order to be manageable. However, many beginning programmers may not realize what the point of this is - especially since some may have tried it themselves and run into so many problems that they decided it wasn't worth the effort. This article should explain why to do it, and how to do it properly. Where necessary, I give a brief explanation of how compilers and linkers work to help understand why you have to do things in a certain way.
Terminology
In this article, I will call standard C and C++ files (usually with the .C or .CPP extension) "source files". This will be to distinguish them from "header files" (usually with the .H or .HPP extension). This terminology is also used by Visual C++ and most books. Note that the difference is purely conceptual - they are both just text files with code inside them. However, as the rest of the article will show, this difference in the way you treat source and header files is very important.
Why split code into several files?
The first question some novice programmers ask when they see a directory full of separate code files is, "why isn't it all just in one file?" To them, they just don't see the point of scattering the code about.
Splitting any reasonably-sized project up buys you some advantages, the most significant of which are the following:
- Speed up compilation - most compilers work on a file at a time. So if all your 10000 lines of code is in one file, and you change one line, then you have to recompile 10000 lines of code. On the other hand, if your 10000 lines of code are spread evenly across 10 files, then changing one line will only require 1000 lines of code to be recompiled. The 9000 lines in the other 9 files will not need recompiling. (Linking time is unaffected.)
- Increase organization - Splitting your code along logical lines will make it easier for you (and any other programmers on the project) to find functions, variables, struct/class declarations, and so on. Even with the ability to jump directly to a given identifier that is provided in many editors and development environments (such as Microsoft Visual C++), there will always be times when you need to scan the code manually to look for something. Just as splitting the code up reduces the amount of code you need to recompile, it also reduces the amount of code you need to read in order to find something. Imagine that you need to find a fix you made to the sound code a few weeks ago. If you have one large file called GAME.C, that's potentially a lot of searching. If you have several small files called GRAPHICS.C, MAINLOOP.C, SOUND.C, and INPUT.C, you know where to look, cutting your browsing time by 3/4.
- Facilitate code reuse - If your code is carefully split up into sections that operate largely independently of each other, this lets you use that code in another project, saving you a lot of rewriting later. There is a lot more to writing reusable code than just using a logical file organization, but without such an organization it is very difficult to know which parts of the code work together and which do not. Therefore putting subsystems and classes in a single file or carefully delineated set of files will help you later if you try to use that code in another project.
- Share code between projects - The principle here is the same as with the reuse issue. By carefully separating code into certain files, you make it possible for multiple projects to use some of the same code files without duplicating them. The benefit of sharing a code file between projects rather than just using copy-and-paste is that any bug fixes you make to that file or files from one project will affect the other project, so both projects can be sure of using the most up-to-date version.
- Split coding responsibilities among programmers - For really large projects, this is perhaps the main reason for separating code into multiple files. It isn't practical for more than one person to be making changes to a single file at any given time. Therefore you would need to use multiple files so that each programmer can be working on a separate part of the code without affecting the file that the other programmers are editing. Of course, there still have to be checks that 2 programmers don't try altering the same file; configuration management systems and version control systems such as CVS or MS SourceSafe help you here.
All of the above can be considered to be aspects of modularity, a key element of both structured and object-oriented design.
How to do it: The Basics
By now you're probably convinced that there are benefits to splitting up your project into several smaller files. So, how would you go about it? Although some of the decisions you make will be reasonably arbitrary, there are some basic rules that you should follow to ensure that it all works.
Firstly, look at how you would split your code into sections. Often this is by splitting it into separate subsystems, or 'modules', such as sound, music, graphics, file handling, etc. Create new files with meaningful filenames so that you know at a glance what kind of code is in them. Then move all the code that belongs to that module into that file. Sometimes you don't have clear module - some would say this should send out warnings about the quality of your design! There may still be other criteria you use for splitting up code, such as the structures it operates upon. (Often "general purpose" functions can be split into string-handling and number-handling, for example.) And occasionally a module could be split into two or more files, because it might make sense to do so on logical grounds.
Once you have split it up in this way into separate source files, the next stage is to consider what will go into the header files. On a very simple level, code that you usually put at the top of the source file is a prime candidate for moving into a separate header file. This is presumably why they got termed 'header' files, after all.
This code to go in a header usually includes some or all of the following:
- class and struct definitions
- typedefs
- function prototypes
- global variables (but see below)
- constants
- #defined macros
- #pragma directives
(Additionally, when using C++, templates and inline functions usually need to be in the header file. The reasons for this should become clear later.)
For examples, look at the standard C libraries that come with any C or C++ compiler. Stdlib.h is one good example; browse to your include directory and open it up in an editor to view it. (Or to save time in MS Visual C++ 6, type in
You generally want one header file for every source file. That is, a SPRITES.CPP probably needs a SPRITES.H file, a SOUND.CPP needs a SOUND.H, and so on. Keep the naming consistent so that you can instantly tell which header goes with which normal file.
These header files become the interface between your subsystems. By #including a header, you gain access to all the structure definitions, function prototypes, constants etc for that subsystem. Therefore, every source file that uses sprites in some way will probably have to #include "sprite.h", every source file that uses sound may need to #include "sound.h", and so on. Note that you use quotes rather than angular brackets when #including your own files. The quotes tell the compiler to look for your headers in the program directory first, rather than the compiler's standard headers.
Remember that, as far as the compiler is concerned, there is absolutely no difference between a header file and a source file. (Exception: some compilers will refuse to compile a header file directly, assuming you made a mistake in asking.) As stated earlier, they are both just plain text files that are filled with code. The distinction is a conceptual one that programmers must adhere to in order to keep the logical file structure intact. The key idea is that headers contain the interface, and the source files contain the actual implementation. This applies whether you are working in C or C++, in an object-oriented way or a structural way. This means that one source file uses another source file via the second source file's header.
Potential Pitfalls
The rules given above are fairly vague and merely serve as a starting point for organizing your code. In simple cases, you can produce completely working programs by following those guidelines. However there are some more details that have to be accounted for, and it is often these details that cause novice programmers so much grief when they first start splitting their code up into header files and normal files.
In my experience, there are four basic errors that people encounter when they first enter the murky world of user-defined header files.
- The source files no longer compile as they can't find the functions or variables that they need. (This often manifests itself in the form of something similar to "error C2065: 'MyStruct' : undeclared identifier" in Visual C++, although this can produce any number of different error messages depending on exactly what you are trying to reference.)
- Cyclic dependencies, where headers appear to need to #include each other to work as intended. A Sprite may contain a pointer to the Creature it represents, and a Creature may contain a pointer to the Sprite it uses. No matter how you do this, either Creature or Sprite must be declared first in the code, and that implies that it won't work since the other type isn't declared yet.
- Duplicate definitions where a class or identifier is included twice in a source file. This is a compile time error and usually arises when multiple header files include one other header file, leading to that header being included twice when you compile a source file that uses them. (In MSVC, this might look something like "error C2011: 'MyStruct' : 'struct' type redefinition.)
- Duplicate instances of objects within the code that compiled fine. This is a linking error, often difficult to understand. (In MSVC, you might see something like "error LNK2005: "int myGlobal" (?myGlobal@@3HA) already defined in myotherfile.obj".)
So how do we fix these issues?
Fixing Problem 1
Luckily, these issues are easy to fix, and even easier to avoid once you understand them.
The first error, where a source file refuses to compile because one of the identifiers was undeclared, is easy to resolve. Simply #include the file that contains the definition of the identifier you need. If your header files are organized logically and named well, this should be easy. If you need to use the Sprite struct, then you probably need to #include "sprite.h" in every file that does so. One mistake that programmers often make is to assume that a file is #included simply because another header #includes it for itself.
Example:
/* Header1.h */
#include "header2.h"
class ClassOne { ... };

/* Header2.h */
class ClassTwo { ... };

/* File1.cpp */
#include "Header1.h"
ClassOne myClassOne_instance;
ClassTwo myClassTwo_instance;
In this case, File1.cpp will compile fine, as including Header1.h has indirectly #included Header2.h, meaning that File1.cpp has access to the Class2 class. But what happens if, at a later date, someone realises that Header1.h doesn't actually need to #include Header2.h? They can remove that #include line, and suddenly File1.cpp will break the next time you try to compile it.
The key here, is to explicitly #include any header files that you need for a given source file to compile. You should never rely on header files indirectly including extra headers for you, as that may change. The 'extra' #includes also serve as documentation, by demonstrating what other code this file is dependent on. So don't try and leave them out if you know you need that header included somehow.
Fixing Problem 2
Cyclic (or two-way) dependencies are a common problem in software engineering. Many constructs involve a two-way link of some sort, and this implies that both classes or structures know about each other. Often this ends up looking like this:
/* Parent.h */
#include "child.h"
class Parent
{
   Child* theChild;
};

/* Child.h */
#include "parent.h"
class Child
{
   Parent* theParent;
};
Given that one of these has to be compiled first, you need some way to break the cycle. In this case, it's actually quite trivial. The Parent struct doesn't actually need to know the details of the Child class, as it only stores a pointer to one. Pointers are pretty much the same no matter what they point to, therefore you don't need to the definition of the structure or class in order to store a pointer to an instance of that structure or class. So the #include line is not needed. However, simply taking it out will give you an "undeclared identifier" error when it encounters the word 'Child', so you need to let the compiler know that Child is a class or class that you wish to point to. This is done with a forward declaration, taking the form of a class or class definition without a body. Example:
/* Parent.h */
class Child; /* Forward declaration of Child; */
class Parent
{
   Child* theChild;
};
Notice how the #include line is replaced by the forward declaration. This has allowed you to break the dependency between Parent.h and Child.h. Additionally, it will speed up compilation as you are reading in one less header file. In this case, the same procedure can (and should) be followed in Child.h by forward declaring "class Parent;" As long as you are only referring to a pointer and not the actual type itself, you don't need to #include the full definition. In 99% of cases, this can be applied to one or both sides of a cycle to remove the need to #include one header from another, eliminating the cyclic dependency.
Of course, in the source files, it's quite likely that there will be functions that apply to Parent that will manipulate the Child also, or vice versa. Therefore, it is probably necessary to #include both parent.h and child.h in parent.c and child.c.

Another situation where I have found cyclic dependencies to arise in C++ is where functions are defined in the header file to make them inline (and hence potentially faster). In order for the function to operate, it often needs to know the details of a class it operates on. This tends to mean that the header file where the inline function is declared needs to #include whichever headers are necessary for the function to compile. The first piece of advice here is that you should only make functions inline when you are sure that they are too slow otherwise. If you have tested your code and certain functions absolutely need to be inlined (and thus in the header file), try and ensure that the dependency between 2 header files is only one way by isolating the inline functions in one of the two headers.
Note that being able to eliminate a dependency entirely is not always possible. Many classes and structs are composed of other classes and structs, which is a dependency you cannot avoid. However, as long as this dependency is one-way, the order of compilation will be fixed and there should be no problem.
There are more in-depth ways of resolving cyclic dependencies, but they are beyond the scope of this article. In 99% of cases, using forward declarations and favoring normal functions in C./.CPP files over inline functions in header files will be enough.
Fixing Problem 3
Duplicate definitions at compile time imply that a header ended up being included more than once for a given source file. This leads to a class or struct being defined twice, causing an error. The first thing you should do is ensure that, for each source file, you only include the headers that you need. This will aid compilation speed since the compiler is not reading and compiling headers that serve no purpose for this file.
Sadly, this is rarely enough, since some headers will include other headers. Let's revisit an example from earlier, slightly modified:
/* Header1.h */
#include "header3.h"
class ClassOne { ... };

/* Header2.h */
#include "header3.h"
class ClassTwo { ... };

/* File1.cpp */
#include "Header1.h"
#include "Header2.h"
ClassOne myClassOne_instance;
ClassTwo myClassTwo_instance;
Header1.h and Header2.h #include header3.h for some reason. Maybe ClassOne and ClassTwo are composed out of some class defined in Header3.h.. The reason itself is not important; the point is that sometimes headers include other headers without you explicitly asking for it, which means that sometimes a header will be #included twice for a given source file, despite your best intentions. Note that it doesn't matter that header3.h is being #included from different header files: during compilation, these all resolve to one file. The #include directive literally says "include the specified file right here in this file while we process it", so all the headers get dumped inline into your source file before it gets compiled. The end result looks something like this:

For the purposes of compilation, File1.cpp ends up containing copies of Header1.h and Header2.h, both of which include their own copies of Header3.h. The resulting file, with all headers expanded inline into your original file, is known as a translation unit. Due to this inline expansion, anything declared in Header3.h is going to appear twice in this translation unit, causing an error.
So, what do you do? You can't do without Header1.h or Header2.h, since you need to access the structures declared within them So you need some way of ensuring that, no matter what, Header3.h is not going to appear twice in your File1.cpp translation unit when it gets compiled. This is where inclusion guards come in.
If you looked at stdlib.h earlier, you may have noticed lines near the top similar to the following:
#ifndef _INC_STDLIB
#define _INC_STDLIB
And at the bottom of the file, something like:
#endif /* _INC_STDLIB */
This is what is known as an inclusion guard. In plain English, it says "if we haven't defined the symbol "_INC_STDLIB" yet, then define it and continue. Otherwise, skip to the #endif." This is a similar concept to writing the following code to get something to run once:
static bool done = false;
if (!done)
{
   /* Do something */
   done = true;
}
This ensures that the 'do something' only ever happens once. The same principle goes for the inclusion guards. During compilation of File1.cpp, the first time any file asks to #include stdlib.h, it reaches the #ifndef line and continues because "_INC_STDLIB" is not yet defined. The very next line defines that symbol and carries on reading in stdlib.h. If there is another "#include
This is trivial to apply to your own projects. At the start of every header file you write, put the following:
#ifndef INC_FILENAME_H
#define INC_FILENAME_H
Note that the symbol (in this case, "INC_FILENAME_H") needs to be unique across your project. This is why it is a good idea to incorporate the filename into the symbol. Don't add an underscore at the start like stdlib.h does, as identifiers prefixed with an underscore are supposed to be reserved for "the implementation" (ie. the compiler, the standard libraries, and so on). Then add the #endif /* INC_FILENAME_H */ at the end of the file. The comment is not necessary, but will help you remember what that #endif is there for.
If you use Microsoft Visual C++, you may have also noticed 3 lines in stdlib.h similar to:
#if     _MSC_VER > 1000
#pragma once
#endif
Other compilers may have code similar to this. This effectively achieves the same thing as the inclusion guards, without having to worry about filenames, or adding the #endif at the bottom of the file, by saying that "for this translation unit, only include this file once". However, remember that this is not portable. Most compilers don't support the #pragma once directive, so it's a good habit to use the standard inclusion guard mechanism anyway, even if you do use #pragma once.
With inclusion guards in all your headers, there should be no way for any given header's contents to end up included more than once in any translation unit, meaning you should get no more compile-time redefinition errors.
So that's compile-time redefinition fixed. But what about the link-time duplicate definition problems?
Fixing Problem 4
When the linker comes to create an executable (or library) from your code, it takes all the object (.obj or .o) files, one per translation unit, and puts them together. The linker's main job is to resolve identifiers (basically, variables or functions names) to machine addresses in the file. This is what links the various object files together. The problem arises when the linker finds two or more instances of that identifier in the object files, as then it cannot determine which is the 'correct' one to use. The identifier should be unique to avoid any such ambiguity. So how come the compiler doesn't see an identifier as being duplicated, yet the linker does?
Imagine the following code:
/* Header.h */
#ifndef INC_HEADER_H
#define INC_HEADER_H
int my_global;
#endif /* INC_HEADER_H */

/* code1.cpp */
#include "header1.h"
void DoSomething()
{
   ++my_global;
}

/* code2.cpp */
#include "header1.h"
void DoSomethingElse()
{
   --my_global;
}
This first gets compiled into two object files, probably called code1.obj and code2.obj. Remember that a translation unit contains full copies of all the headers included by the file you are compiling. Finally, the object files are combined to produce the final file.
Here's a visual depiction of the way these files (and their contents) are combined:

Notice how there are two copies of "my_global" in that final block. Although "my_global" was unique for each translation unit (this would be assured by the use of the inclusion guards), combining the object files generated from each translation unit would result in there being more than one instance of my_global in the file. This is flagged as an error, as the linker has no way of knowing whether these two identifiers are actually same one, or if one of them was just misnamed and they were actually supposed to be 2 separate variables. So you have to fix it.
The answer is not to define variables or functions in headers. Instead, you define them in the source files where you can be sure that they will only get compiled once (assuming you don't ever #include any source files, which is a bad idea for exactly this reason). This gives you a new problem: how do you make the functions and variables globally visible if they aren't in a common header any more? How will other files "see" them? The answer is to declare the functions and variables in the header, but not to define them. This lets the compiler know that the function or variable exists, but delegates the act of resolving the address to the linker.
To do this for a variable, you add the keyword 'extern' before its name:
extern int my_global;
The 'extern' specifier is like telling the compiler to wait until link time to resolve the 'connection'. And for a function, you just put the function prototype:
int SomeFunction(int parameter);
Functions are considered 'extern' by default so it is customary to omit the 'extern' in a function prototype.
Of course, these are just declarations that my_global and SomeFunction exist somewhere. It doesn't actually create them. You still have to do this in one of the source files, as otherwise you will see a new linker error when it finds it cannot resolve one of the identifiers to an actual address. So for this example, you would add "int my_global" to either Code1.cpp or Code2.cpp, and everything should work fine. If it was a function, you'd add the function including its body (ie. the code of the function) into one of the source files.
The rule here is to remember that header files define an interface, not an implementation. They specify which functions, variables, and objects exist, but it is not responsible for creating them. They may say what a struct or class must contain, but it shouldn't actually create any instances of that struct or class. They can specify what parameters a function takes and what it returns, but not how it gets the result. And so on. This is why the list of what can go into a header file earlier in this article is important.
For convenience, some people like to put all the 'extern' declarations into a Globals.h file, and all the actual definitions into a Globals.cpp file. This is similar to the approach MS Visual C++ takes in the automatically generated projects by providing stdafx.h and stdafx.cpp. Of course, most experienced programmers would tell you that global variables are generally bad, and therefore making an effort to reduce or eliminate them will improve your program anyway. Besides, most so-called globals don't need to be truly global. Your sound module probably doesn't need to see your Screen object or your Keyboard object. So try to keep variables in their own modules rather than placing them all together just because they happen to be 'global'.
There are two notable exceptions to the "no function bodies in header files", because although they look like function bodies, they aren't exactly the same.
The first exception is that of template functions. Most compilers and linkers can't handle templates being defined in different files to that which they are used in, so templates almost always need to be defined in a header so that the definition can be included in every file that needs to use it. Because of the way templates are instantiated in the code, this doesn't lead to the same errors that you would get by defining a normal function in a header. This is because templates aren't compiled at the place of definition, but are compiled as they are used by code elsewhere.
The second exception is inline functions, briefly mentioned earlier. An inline function is compiled directly into the code, rather than called in the normal way. This means that any translation unit where the code 'calls' an inline function needs to be able to see the inner workings (ie. the implementation) of that function in order to insert that function's code directly. This means that a simple function prototype is insufficient for calling the inline function, meaning that wherever you would normally just use a function prototype, you need the whole function body for an inline function. As with templates, this doesn't cause linker errors as the inline function is not actually compiled at the place of definition, but is inserted at the place of calling.
Other Considerations
So, your code is nicely split across various files, giving you all the benefits mentioned at the start like increased compilation speed and better organization. Is there anything else you need to know?
Firstly, if you use the C++ standard library, or any other library that uses namespaces, you may find yourself using their identifiers in your header files. If so, don't use the "using" keyword in your headers, as it reduces the effectiveness of namespaces almost to the point of uselessness. Instead, put the using keyword in the source files if necessary, and explicitly qualify the names with their namespace prefix in the header files. Otherwise, when you start using functions that have the same names as the standard library, whether your own or from another library, you'll either have to start renaming them, or go back and edit your header anyway, which in turn will affect all the files that depend on it. Better to do it properly in the first place.
Secondly, the use of macros should be carefully controlled. C programmers have to rely on macros for a lot of functionality, but C++ programmers should avoid them wherever possible. If you want a constant in C++, use the 'const' keyword. If you want an inline function in C++, use the 'inline' keyword. If you want a function that operates on different types in C++, use templates or overloading. But if you need to use a macro for some reason, and you place it in a header file, try not to write macros that could potentially interfere with code in the files that include it. When you get weird compilation errors, you don't want to have to search through every header file to see if someone used a #define to inadvertently change your function or its parameters to something else. So wherever possible, keep macros out of headers unless you can be sure that you don't mind them affecting everything in the project.
Conclusion
If done properly, organizing your files this way can speed your development without hindering you at all or introducing any extra problems. Although it seems like there is a lot to consider when doing so, it becomes second nature in no time. Just remember these key points:
- Split your code up along logical module divisions
- The the interface into the header files and the implementation in the source files
- Use forward declarations wherever possible to reduce dependencies
- Add an inclusion guard to every header file you make
- Don't put code in the headers that might adversely affect source files that include it
Good luck!
Tuesday, October 13, 2009
gnuplot
This is a nice tool. I am also thinking about getting a matlab which never expires.
The drawing ability of matlab is amazing.
Generally, we want to find a tool that could load the input data file, store the customization of the user, and generate portable figure file format.
In this case, we can write the scripts to draw the graphs and finish this job automatically.
Let's look at gnuplot to see how it fits the needs.
One basic example illustrating the configuration is like this:
set terminal latex
set output "eg3.tex"
set format xy "$%g$" #set the data format in the figure
set title "This is another plot" #title
set xlabel "$x$ axis" #x and y label
set ylabel "$y$ axis"
set key at 15,-10
plot x with lines, "eg3.dat" with linespoints
If we want to print the data in log scale, then the command should be
set log xy #in log scale, the y range must be greater than 0
use:
set xrange [ : ] to set the range of x, similarly for y set yrange..
2. How to load the data from files
The data file can be
Discrete data contained in a file can be displayed by specifying the name of the data file (enclosed in quotes) on the plot or splot command line. Data files should have the data arranged in columns of numbers. Columns should be separated by white space (tabs or spaces) only, (no commas). Lines beginning with a # character are treated as comments and are ignored by Gnuplot. A blank line in the data file results in a break in the line connecting data points.
For example your data file, force.dat , might look like:
      # This file is called   force.dat
     # Force-Deflection data for a beam and a bar
     # Deflection    Col-Force       Beam-Force
     0.000              0              0
     0.001            104             51
     0.002            202            101
     0.003            298            148
     0.0031           290            149
     0.004            289            201
     0.0041           291            209
     0.005            310            250
     0.010            311            260
     0.020            280            240
You can display your data by typing:
      gnuplot>  plot  "force.dat" using 1:2 title 'Column', \
                     "force.dat" using 1:3 title 'Beam'
Saturday, October 10, 2009
weekly summary for 10/10
This new quarter is really a very busy one. I wanted to select as few courses
as possible. However, now I have five courses and tons of homeworks to finish.
Besides, the research load is heavy. I am a little exhausted now.
PAINFUL, BUT DELIGHTFUL!
The courses are interesting, and the assignments sometimes are challenging.
I like it in fact. What's more, we have made progress on the research. This could
be an interesting work.
Today's assignments:
1. Discuss the 621 with others; try to finish it today.
2. Implement the evaluation measure. This is the major tasks today.
3. Read the statistical inference.
4. Start thinking about the datasets and the implementation of the final
outlier detection step.
Thursday, October 8, 2009
the netflix prize!
that contest.
Saturday, October 3, 2009
I will work harder and try my best in the following two weeks
1. Finish the homework of 620&621.
2. Construct the graph, and implement the algorithms to split the
graph.
3. consider the definitions, and try to compare them.
4. Is it possible to use the LSH idea?
5. Be open minded.
Wednesday, September 30, 2009
I need to manage the time more efficiently!
Today's to do list:
1. Finish reading the paper "efficient mining frequent trees in a forest: algorithms
and applications"
2. Review the 621 and STAT620 class.
3. Write some codes to test the effectiveness of various pruning techniques based
on the clustering.
Sunday, September 27, 2009
how to shuffle data in out-of-core manner?
memory, the current shuffle methods that assume all the data resides in memory could no longer be used directly.
Here we use a method similar to the way in shuffling the cards ( similar to mergesort):
while( iteration < setvalue)
{
tmpfile_set = split(datafile)
datafile = merge(tmpfile_set)
delete(tmpfile_set)
iteration <= iteration + 1
}
Another way to do this is to use fopen64 function. This function is used to
open large files that could not be loaded into the memory at once. We can find
a way to shuffle the data as follows:
1. find a permutation of the [1...N], where N is the total number of records.
Suppose the permutation is [n1, n2, n3,..., nN]
2. try to put the ith record in the original file to the ni th place in the new file.
In this method, we would need to consider the following issues:
a. the fseek function is needed in step 2. If missing values exist, then the starting point of a record is difficult to find.
b. the running time of this algorithm seems a problem coz fseek may cross several blocks? I do not know how to analysis the time now.
Friday, September 18, 2009
vim advanced
CTRL-W r    *CTRL-W_r* *CTRL-W_CTRL-R* *E443*
CTRL-W CTRL-R Rotate windows downwards/rightwards.  The first window becomes
  the second one, the second one becomes the third one, etc.
  The last window becomes the first window.  The cursor remains
  in the same window.
  This only works within the row or column of windows that the
  current window is in.


      *CTRL-W_R*
CTRL-W R Rotate windows upwards/leftwards.  The second window becomes
  the first one, the third one becomes the second one, etc.  The
  first window becomes the last window.  The cursor remains in
  the same window.
  This only works within the row or column of windows that the
  current window is in.


CTRL-W x     *CTRL-W_x* *CTRL-W_CTRL-X*
CTRL-W CTRL-X Without count: Exchange current window with next one.  If there
  is no next window, exchange with previous window.
  With count: Exchange current window with Nth window (first
  window is 1).  The cursor is put in the other window.
  When vertical and horizontal window splits are mixed, the
  exchange is only done in the row or column of windows that the
  current window is in.

The following commands can be used to change the window layout.  For example,
when there are two vertically split windows, CTRL-W K will change that in
horizontally split windows.  CTRL-W H does it the other way around.


      *CTRL-W_K*
CTRL-W K Move the current window to be at the very top, using the full
  width of the screen.  This works like closing the current
  window and then creating another one with ":topleft split",
  except that the current window contents is used for the new
  window.


      *CTRL-W_J*
CTRL-W J Move the current window to be at the very bottom, using the
  full width of the screen.  This works like closing the current
  window and then creating another one with ":botright split",
  except that the current window contents is used for the new
  window.


      *CTRL-W_H*
CTRL-W H Move the current window to be at the far left, using the
  full height of the screen.  This works like closing the
  current window and then creating another one with
  ":vert topleft split", except that the current window contents
  is used for the new window.
  {not available when compiled without the +vertsplit feature}


      *CTRL-W_L*
CTRL-W L Move the current window to be at the far right, using the full
  height of the screen.  This works like closing the
  current window and then creating another one with
  ":vert botright split", except that the current window
  contents is used for the new window.
  {not available when compiled without the +vertsplit feature}

Some about tabs

Move between tabs:
using "gt"!
Create new tabs:
tabedit
Let's say you're editing six or seven files in Vim and realize that you need to replace a variable name with a new one. Using the :tabdo command, you can run a search and replace through all of the tabs at once rather than changing each file individually. For instance, if you want to replace foo with bar, you'd run this:
:tabdo %s/foo/bar/g
That will run through each open tab and run the search and replace command (%s/foo/bar/g) in each one.
Tabs can be extremely useful, and it only takes a short while to become proficient with them. For more on working with tabs in Vim, run :help tab-page-intro within Vim.
Monday, September 14, 2009
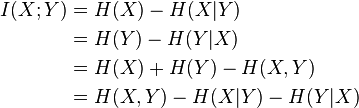
Some key concepts in information theory

- Joint Entropy:


- Mutual Information:

Sunday, September 13, 2009
plan 9.13
2. Try to integrate the code of B&R. Almost done!
Friday, September 11, 2009
the check archive command for tar and gzip
tar -tvf file.tar WILL LIST ALL the files in the file.tar archive.
GZIP
gzip -l
After several days' testing and running
Tuesday, September 8, 2009
Monday, September 7, 2009
the to do list for 9/7
2. The job this week is implement the LSH scheme.
3. Today I need to figure out how to generate the gaussian distribution
Saturday, September 5, 2009
python exceptions
java : try catch throw finally?
The mechnisms of the exceptions are the same.
If we want to catch multiple exceptions:
A try statement may have more than one except clause, to specify handlers for different exceptions. At most one handler will be executed. Handlers only handle exceptions that occur in the corresponding try clause, not in other handlers of the same try statement. An except clause may name multiple exceptions as a parenthesized tuple, for example:
... except (RuntimeError, TypeError, NameError):
... pass
How to print the exception info inside the except statement
>>> try:... raise Exception('spam', 'eggs')
... except Exception as inst:
... print type(inst) # the exception instance
... print inst.args # arguments stored in .args
... print inst # __str__ allows args to printed directly
... x, y = inst # __getitem__ allows args to be unpacked directly
... print 'x =', x
... print 'y =', y
Monday, August 31, 2009
the groups in Ubuntu
groupadd—This command creates and adds a new group.
groupdel—This command removes an existing group.
groupmod—This command creates a group name or GIDs but doesn't add or delete members from a group.
gpasswd—This command creates a group password. Every group can have a group password and an administrator. Use the -A argument to assign a user as group administrator.
useradd -G—The -G argument adds a user to a group during the initial user creation. (More arguments are used to create a user.)
usermod -G—This command allows you to add a user to a group so long as the user is not logged in at the time.
grpck—A command for checking the /etc/group file for typos.
As an example, there is a DVD-RW device (/dev/scd0) on our computer that the sysadmin wants a regular user named john to have access to. To grant john that access, we would follow these steps:
1. | Add a new group with the groupadd command: # groupadd dvdrw |
2. | Change the group ownership of the device to the new group with the chgrp command: # chgrp dvdrw /dev/scd0 |
3. | Add the approved user to the group with the usermod command: # usermod -G dvdrw john |
4. | Make user john the group administrator with the gpasswd command so that she can add new users to the group: # gpasswd -A john |
Friday, August 28, 2009
About the convience variable in GDB and how to print arrays in GDB
Convenience variables
GDB provides convenience variables that you can use within GDB to hold on to a value and refer to it later. These variables exist entirely within GDB; they are not part of your program, and setting a convenience variable has no direct effect on further execution of your program. That is why you can use them freely.
Convenience variables are prefixed with `$'. Any name preceded by `$' can be used for a convenience variable, unless it is one of the predefined machine-specific register names (see section Registers). (Value history references, in contrast, are numbers preceded by `$'. See section Value history.)
You can save a value in a convenience variable with an assignment expression, just as you would set a variable in your program. For example:
set $foo = *object_ptr
would save in $foo the value contained in the object pointed to by object_ptr.
Using a convenience variable for the first time creates it, but its value is void until you assign a new value. You can alter the value with another assignment at any time.
Convenience variables have no fixed types. You can assign a convenience variable any type of value, including structures and arrays, even if that variable already has a value of a different type. The convenience variable, when used as an expression, has the type of its current value.
show convenience- Print a list of convenience variables used so far, and their values. Abbreviated
show con.
One of the ways to use a convenience variable is as a counter to be incremented or a pointer to be advanced. For example, to print a field from successive elements of an array of structures:
set $i = 0
print bar[$i++]->contents
Repeat that command by typing RET.
How to print Arrays in GDB?
You can do this by referring to a contiguous span of memory as an artificial array, using the binary operator `@'. The left operand of `@' should be the first element of the desired array and be an individual object. The right operand should be the desired length of the array. The result is an array value whose elements are all of the type of the left argument. The first element is actually the left argument; the second element comes from bytes of memory immediately following those that hold the first element, and so on. Here is an example. If a program says
int *array = (int *) malloc (len * sizeof (int));
you can print the contents of array with
p *array@len
Tuesday, August 25, 2009
some plans in the following days
Monday, August 17, 2009
Two ways to get the index and the value from List in Python
One is :
for index, item in enumerate(L):The other is:
print index, item
    for index in range(len(L)):
      print index, L[index]

Still need to work hard on research. Seems the proof is wrong.
The index method does a linear search, and stops at the first matching item. If no matching item is found, it raises a ValueError exception.
try:i = L.index(value)
except ValueError:
i = -1 # no match
To get the index for all matching items, you can use a loop, and pass in a start index:
i = -1try:
while 1:
i = L.index(value, i+1)
print "match at", i
except ValueError:
pass
Thursday, August 13, 2009
Tuesday, August 11, 2009
the locality sensitive hashing method for nearest neighbor search
1. The approximation method, not an exact one.
2. Could be used when approximate answer is acceptable.
3. A very simplified description of the LSH alg.
A hash function is called locality sensitive if for any two points p, q, Pr(h[p] = h[q]) is strictly decreasing as the distance between p and q increases.
An example, please look at the CACM paper about LSH.
1. Generate a set of vectors. The dimension of the vectors should be the same as the one of the data points. Each value in these vectors follows a certain distribution(normal distribution) and these values are independent to each other.
2. Compute a fingerprint for each data point using the above vectors. We need to make sure that the closest the two points, the more likely the corresponding fingerprints would be the same.
For the sake of the NNSs,
collect all the data that has the same hash values, and calculate the real distance to check whether they are NNs or not.
Continuing the summary in 8.10
This is similar to the B/B+-tree indexing. The difference is, in B+-tree, the keys are one dimension value, while in R+-tree, the keys are bounding boxes. All the data in R-tree is in the leaf nodes.
Insertion in R-tree: If a region is not included in the current bounding boxes, insert it to the bounding boxes that would cause least changes. When a node becomes too full, split it(many variants here).
R+-tree is better in querying. An insertion may go down along many paths as a region R must be inserted to all bounding boxes that overlaps with it. However, the searching could be much fast as you could choose any path to check.
plan 8.11
2. Continue on the outlier detection, prove that the lazy calculation would generate better results than the proposed one.
3. Finish the english recording, the feedback, the class observation and so on.
4. Update the code for the backup&recovery system.
5. Read three news in English
Monday, August 10, 2009
青春无悔
Youth is not a time of life; it is a state of mind. It is not a matter of rosy cheeks, red lips and supple knees. It is a matter of the will, a quality of the imagination, vigor of the emotions; it is the freshness of the deep spring of life.
Youth means a temperamental predominance of courage over timidity, of the appetite for adventure over the love of ease. This often exits in a man of 60, more than a boy of 20.nobody grows merely by the number of years; we grow old by deserting our ideas. Years may wrinkle the skin, but to give up enthusiasm wrinkles the soul. Worry, fear, self-distrust1 bows the heart and turns the spirit back to dust.
Whether 60 or 16, there is in every human being’s heart the lure of wonders, the unfailing childlike appetite of what’s next and the joy of the game of living. In the center of your heart and my heart there is a wireless station; so long as it receives messages of beauty, hope, cheer, courage and power from men and from infinite, so long as you are young.
When the aerials are down, and your spirit is covered with the snows of cynicism and the ice of pessimism, then you’ve grown old, even at 20, but as long as your aerials are up, to catch waves of optimism, there’s hope you may die young at 80.
a summary about nearest neighbor search
Problem statement: Given a dataset, find the nearest neighbor(s) for a certain point q.
1. Linear search
Scan the dataset linearly, and find the point that has the shortest distance to q. Although the time complexity is linear to the data size, it is not scalable when the size is extremly large, i.e., billions of webpages.
2. The use of tree structures
Two methods would be covered here. When the dimension is k:
kd-tree: short for k-dimensional tree.
The construction of the kd-tree is quite similar to the binary tree, except that each node is a k dimensional data point. When we split the data points at the ith depth, we select the median of the (i mod k) dimension of these points as node, and put the data points that are less than the node to the left, otherwise to the right. We keep on splitting the data points until we have no point to split.
Adding/deleting element, and updating the tree is omitted for simplicity.
When it is used for NNS, the pruning technique is employed(applied, used). The search is in a depth-first manner. We try to see whether the data points under a certain node could be neighbors of the query point q. If not possible, we prune the whole subtree.
It is pointed out the kd-tree is not good for the high dimensional search for the NNS.
R-tree: it is similar to B-tree. All the data points are put in the leaf nodes, while in kd-tree the internal nodes could also be data points. It also has efficient updating algorithm, which makes it suitable for the dynamically changing data. Each non-leaf node stores two pieces of data: one is pointers to other data points, the other is the bounding box for these data points.
The creation of the R-tree: to be continued.
Reference one: http://en.wikipedia.org/wiki/Nearest_neighbor_search
Friday, August 7, 2009
Wednesday, August 5, 2009
read in English
–if you are still reading/writing in your mother tongue more than 50% of your time, then your English will hardly improve
Monday, August 3, 2009
whole word matching in vim
suppose you want to match fname in a c file, but not the fnames.
You could try /fname\W, where \W can match any non-letter.
If you want to match fnames rather than fname, use /fnames
A link about the vim re can be found here:
http://www.geocities.com/volontir/#substitute
Sunday, August 2, 2009
Saturday, August 1, 2009
iterating over datastructures in python
>>> params = {"server":"mpilgrim", "database":"master", "uid":"sa", "pwd":"secret"}
>>> for (u, v) in params:
... print u+" " +v
...
pwd secret
database master
uid sa
server mpilgrim
2. To iterate over a list:
>>> params = ["server", "mpilgrim", "database", "master", "uid", "sa", "pwd", "secret"]
>>> for elem in params:
... print elem
server
mpilgrim
database
master
uid
sa
pwd
secret
To get the index of the element at the same time, use the following format:
>>> params = ["server", "mpilgrim", "database", "master", "uid", "sa", "pwd", "secret"]
>>> for i in range(len(params)):
... print (i, params[i])
...
(0, 'server')
(1, 'mpilgrim')
(2, 'database')
(3, 'master')
(4, 'uid')
(5, 'sa')
(6, 'pwd')
(7, 'secret')
3. To iterate over a tuple:
the same as the list
4. To iterate over a set:
The same as the list
lack of mathematics and statistics knowledge
Tuesday, July 28, 2009
extract a file from the .tar file
Take a file named with backup.tar for example. We want to extract the file named update_log inside the backup directory.
tar -xvf backup.tar backup/update__log
Done!
If the file is .tar.gz, we can similarly use
tar -xzvf backup.tar.gz backup/update__log
a comment about the find command
find /home/ye/Backup/ -type d -name apattern -exec rm -rf '{}' \;
- -name pattern
- Base of file name (the path with the leading directories removed) matches shell pattern pattern. The metacharacters (`*', `?', and `[]') do not match a `.' at the start of the base name. To ignore a directory and the files under it, use -prune; see an example in the description of -path.
- -exec command ;
- Execute command; true if 0 status is returned. All following arguments to find are taken to be arguments to the command until an argument consisting of `;' is encountered. The string `{}' is replaced by the current file name being processed everywhere it occurs in the arguments to the command, not just in arguments where it is alone, as in some versions of find. Both of these constructions might need to be escaped (with a `\') or quoted to protect them from expansion by the shell. The command is executed in the starting directory.
Monday, July 27, 2009
starting the implementation of the research project!
We need to first find the proper datasets.
Here we target on two datasets.
One is the climate dataset. It has the format of
The other one is the stock dataset. It has the format of
We use C++ to implement the problem. Write more when I start coding.
One is about the
A time schedule for the project:
Sunday, July 26, 2009
for fun~
... 7月4日 新开这本日记,也为了督促自己下个学期多下些苦功。先要读完手边的莎士比亚的《亨利八世》... …
7月13日 打牌。
7月14日 打牌。
7月15日 打牌。
7月16日 胡适之啊胡适之!你怎么能如此堕落!先前订下的学习计划你都忘了吗? 子曰:“吾日三省吾身。”...不能再这样下去了!
7月17日 打牌。
7月18日 打牌。
Saturday, July 25, 2009
Using SSH without password
The original link for this post is: http://www.hostingrails.com/wiki/27/HowTo-SSHSCP-without-a-password
HowTo SSH/SCP without a password.
This is a wiki article created by HostingRails users. Please login or signup to make edits.
This small HowTo will explain how to setup key-based authentication for password-less SSH and SCP usage.
This HowTo does assume the reader has some basic knowledge of ssh and a terminal, and is using an operating system that implements SSH. If you're using a Windows OS and want to use SSH, try PuTTY. For Putty, see key-based auth with Putty.
In the examples that follow please substitute 'servername' , 'ipaddress' and 'username' with the proper information for your setup. I have included a list of weblinks for the words in italic at the end of this document.
Step 1. Verify that you can connect normally (using a password) to the server you intend to setup keys for:
#### Examples ####
user@homebox ~ $ ssh username@'servername'
# Or:
user@homebox ~ $ ssh username@'ipaddress'
# If your username is the same on both the client ('homebox') and the server ('servername'):
user@homebox ~ $ ssh 'servername'
# Or:
user@homebox ~ $ ssh 'ipaddress'
# If this is your first time connecting to 'servername' (or 'ipaddress'), upon establishing a connection with the
# server you'll be asked if you want to add the servers fingerprint to the known_hosts file on your computer.
# Press 'enter' to add the fingerprint.
Step 2. Now that you're connected to the server and verified that you have everything you need for access (hopefully), disconnect by typing 'exit' .
#### Examples ####
user@servername ~ $ exit
# You should be back at:
user@homebox ~ $
Step 3. The next step is to copy a unique key generated on your 'homebox' to the server you are connecting too. First, before you generate a new key, check to see if you already have a key:
#### Example ####
user@homebox ~ $ ls -l ~/.ssh
total 20
-rwx--xr-x 1 user user 601 Feb 2 01:58 authorized_keys
-rwx--xr-x 1 user user 668 Jan 1 19:26 id_dsa
-rwx--xr-x 1 user user 599 Jan 1 19:26 id_dsa.pub
-rwx--xr-x 1 user user 6257 Feb 2 21:04 known_hosts
# The file we need to copy to the server is named id_dsa.pub. As you can see above, the file needed exists. You may or may not have other files in ~/.ssh as I do. If the key doesn't exist, however, you can make one as follows:
#### Example ####
user@homebox ~ $ ssh-keygen -t dsa
Generating public/private dsa key pair.
Enter file in which to save the key (/home/user/.ssh/id_dsa): # Press 'enter' here
Enter passphrase (empty for no passphrase): # Press 'enter' here
Enter same passphrase again: # Press 'enter' here
Your identification has been saved in /home/user/.ssh/id_dsa.
Your public key has been saved in /home/user/.ssh/id_dsa.pub.
The key fingerprint is:
6f:c3:cb:50:e6:e9:90:f0:0f:68:d2:10:56:eb:1d:91 user@host
# Entering a password when asked during the key generation processes when prompted would require you to enter a password each time you SSH/SCP to the server which defeats the purpose of this document.
Step 4. Regardless whether you had a key ready to go or if you had to generate a new key, the next step is the same in either case. Now you're ready to copy the key to the server. Do so like this:
#### Example ####
user@homebox ~ $ ssh-copy-id -i ~/.ssh/id_dsa.pub user@'servername' (or 'ipaddress')
# If you are asked weather or not you wish to continue, say yes.
Step 5. Now it's time to test the setup. To do that, try to ssh to the server:
#### Example ####
user@homebox ~ $ ssh 'servername' (or 'ipaddress')
# You should log in to the remote host without being asked for a password.
Step 6. You can now SSH or SCP to the remote host without having to enter a password at each connection. To make sure your public key stays secure from prying eyes, do the following to change permissions and restrict access on 'homebox' and also on 'servername' to ~/.ssh:
#### Example ####
user@homebox ~ $ chmod 600 ~/.ssh/id_dsa ~/.ssh/id_dsa.pub
# Verify the permissions on the files:
#### Example ####
user@homebox ~ $ ls -l ~/.ssh
-rw------- 1 user user 668 Feb 4 19:26 id_dsa
-rw------- 1 user user 599 Feb 4 19:26 id_dsa.pub
Links
1. OpenSSH
2. known_hosts
3. fingerprint
------
Nice post!
I've noticed that I don't have the command ssh-copy-id on my OS X machine (I didn't even know one existed!). To achieve the same effect I usually do the following:
user@homebox ~ $ scp ~/.ssh/id_dsa.pub user@'servername':.ssh/authorized_keysThis is assuming you've already created a .ssh directory on your server 'servername' (just ssh in as normal and `mkdir .ssh`). This also assumes that you don't already have an `authorized_keys` file in the .ssh directory on your server. If you do just copy (scp) the id_dsa.pub file to a temporary file in your server's home directory and then
user@homebox ~ $ scp .ssh/id_dsa.pub user@servername:homebox_dsa.pubIf you've got it, the ssh-copy-id way is clearly a lot easier!
user@homebox ~ $ ssh user@servername
user@servername ~ $ cat homebox_dsa.pub >> .ssh/authorized_keys
user@servername ~ $ rm homebox_dsa.pub
~ Mark
Hi Mark. Thanks for adding that bit. I don't have access to a Mac (new one anyway) so that's very nice to know.
Seth
Seth, I liked this post a lot, but felt the formatting and wording can be improved. I've made a few changes to the introduction.
Xin
(I wish I had used my name for my username now!)
-------
I found an elegant way of creating a new, or adding to an existing authorized_keys file with a single command:
ssh username@somedomain.com -n "echo `cat ~/.ssh/id_dsa.pub` >> ~/.ssh/authorized_keys"-
I think it *is* a good practice to use pass phrases when using ssh keys. You can use ssh-agent on Linux and SSH Agent or SSHKeychain on Mac OS X, to avoid you to type your pass phrase everytime you access a remote host. Also, you can forward your keys using 'ssh -A' if you need to hop onto some host in the middle.
-- Igor"
-------
I'm using PUTTY (pageant) on a XP and on Vista. I use 2048 RSA private key that is password protected. I typically use PUTTY to connect, fyi: my purpose is really to be able to use git (which uses SSH) without having to log in every time I commit. Assuming you are too and have a key generated already...
load key into PuttyGen (enter password for the key) in the window copy the "public key for pasting into OpenSSH..." append this to the ~/.ssh/authorized_keys.
One comment: when I used the append from above aka the elegant code, it did not add a \n at the end of the line aka didn't work. I vi'd the file added a new line.
--Eric
Wednesday, July 22, 2009
How to run linux command regularly?
cron is a Linux system process that will execute a program at a preset time. To use cron you must prepare a text file that describes the program that you want executed and the times that cron should execute them. Then you use the crontab program to load the text file that describes the cron jobs into cron.
Here is the format of a cron job file:
[min] [hour] [day of month] [month] [day of week] [program to be run]
where each field is defined as
| [min] | Minutes that program should be executed on. 0-59. Do not set as * or the program will be run once a minute. |
| [hour] | Hour that program should be executed on. 0-23. * for every hour. |
| [day of month] | Day of the month that process should be executed on. 1-31. * for every day. |
| [month] | Month that program whould be executed on. 1-12 * for every month. |
| [day of week] | Day of the week. 0-6 where Sunday = 0, Monday = 1, ...., Saturday = 6. * for every day of the week. |
| [program] | Program to be executed. Include full path information. |
Here are some examples:
0,15,30,45 * * * * /usr/bin/foo
Will run /usr/bin/foo every 15 minutes on every hour, day-of-month, month, and day-of-week. In other words, it will run every 15 minutes for as long as the machine it running.
10 3 * * * /usr/bin/foo
Will run /usr/bin/foo at 3:10am on every day.
10 * 1 * * /usr/bin/foo
Will run /usr/bin/foo at 12:10am on the first day of the month.
10 * * 1 * /usr/bin/foo
Will run /usr/bin/foo at 12:10am on the first month of the year.
10 14 * * 1 /usr/bin/foo
Will run /usr/bin/foo at 2:10pm on every Monday.
There are more options for these. See man man crontab -S 5.
You must use crontab to load cron jobs into cron. First create a text file that uses the above rule to describe the cron job that you want to load into cron. But before you load it, type crontab -l to list any jobs that are currently loaded in crontab.
If none are listed, then it is safe to load your job. Example. If you wanted to run /usr/local/bin/foo once a day at 3:10am, then create a text file
10 3 * * * /usr/bin/foo
Save it as foo.cron. Then type crontab foo.cron. Check to see if it was loaded by typing crontab -l. It should display something like this:
# DO NOT EDIT THIS FILE - edit the master and reinstall.
# (ipwatch.cron installed on Thu Nov 18 11:48:02 1999)
# (Cron version -- $Id: crontab.c,v 2.13 1994/01/17 03:20:37 vixie Exp $)
10 3 * * * /usr/bin/foo
If you want to edit the cron job, then edit foo.cron and then remove the existing cron job (crontab -r) and load it again (crontab foo.cron). You can have multiple jobs. Just put each different one on a seperate line in foo.cron.
contab jobs will run under the user that was in effect when you loaded the job in crontab.
See man cron, man crontab and man crontab -S 5 for more information.